To define the inspection scope, follow these steps:
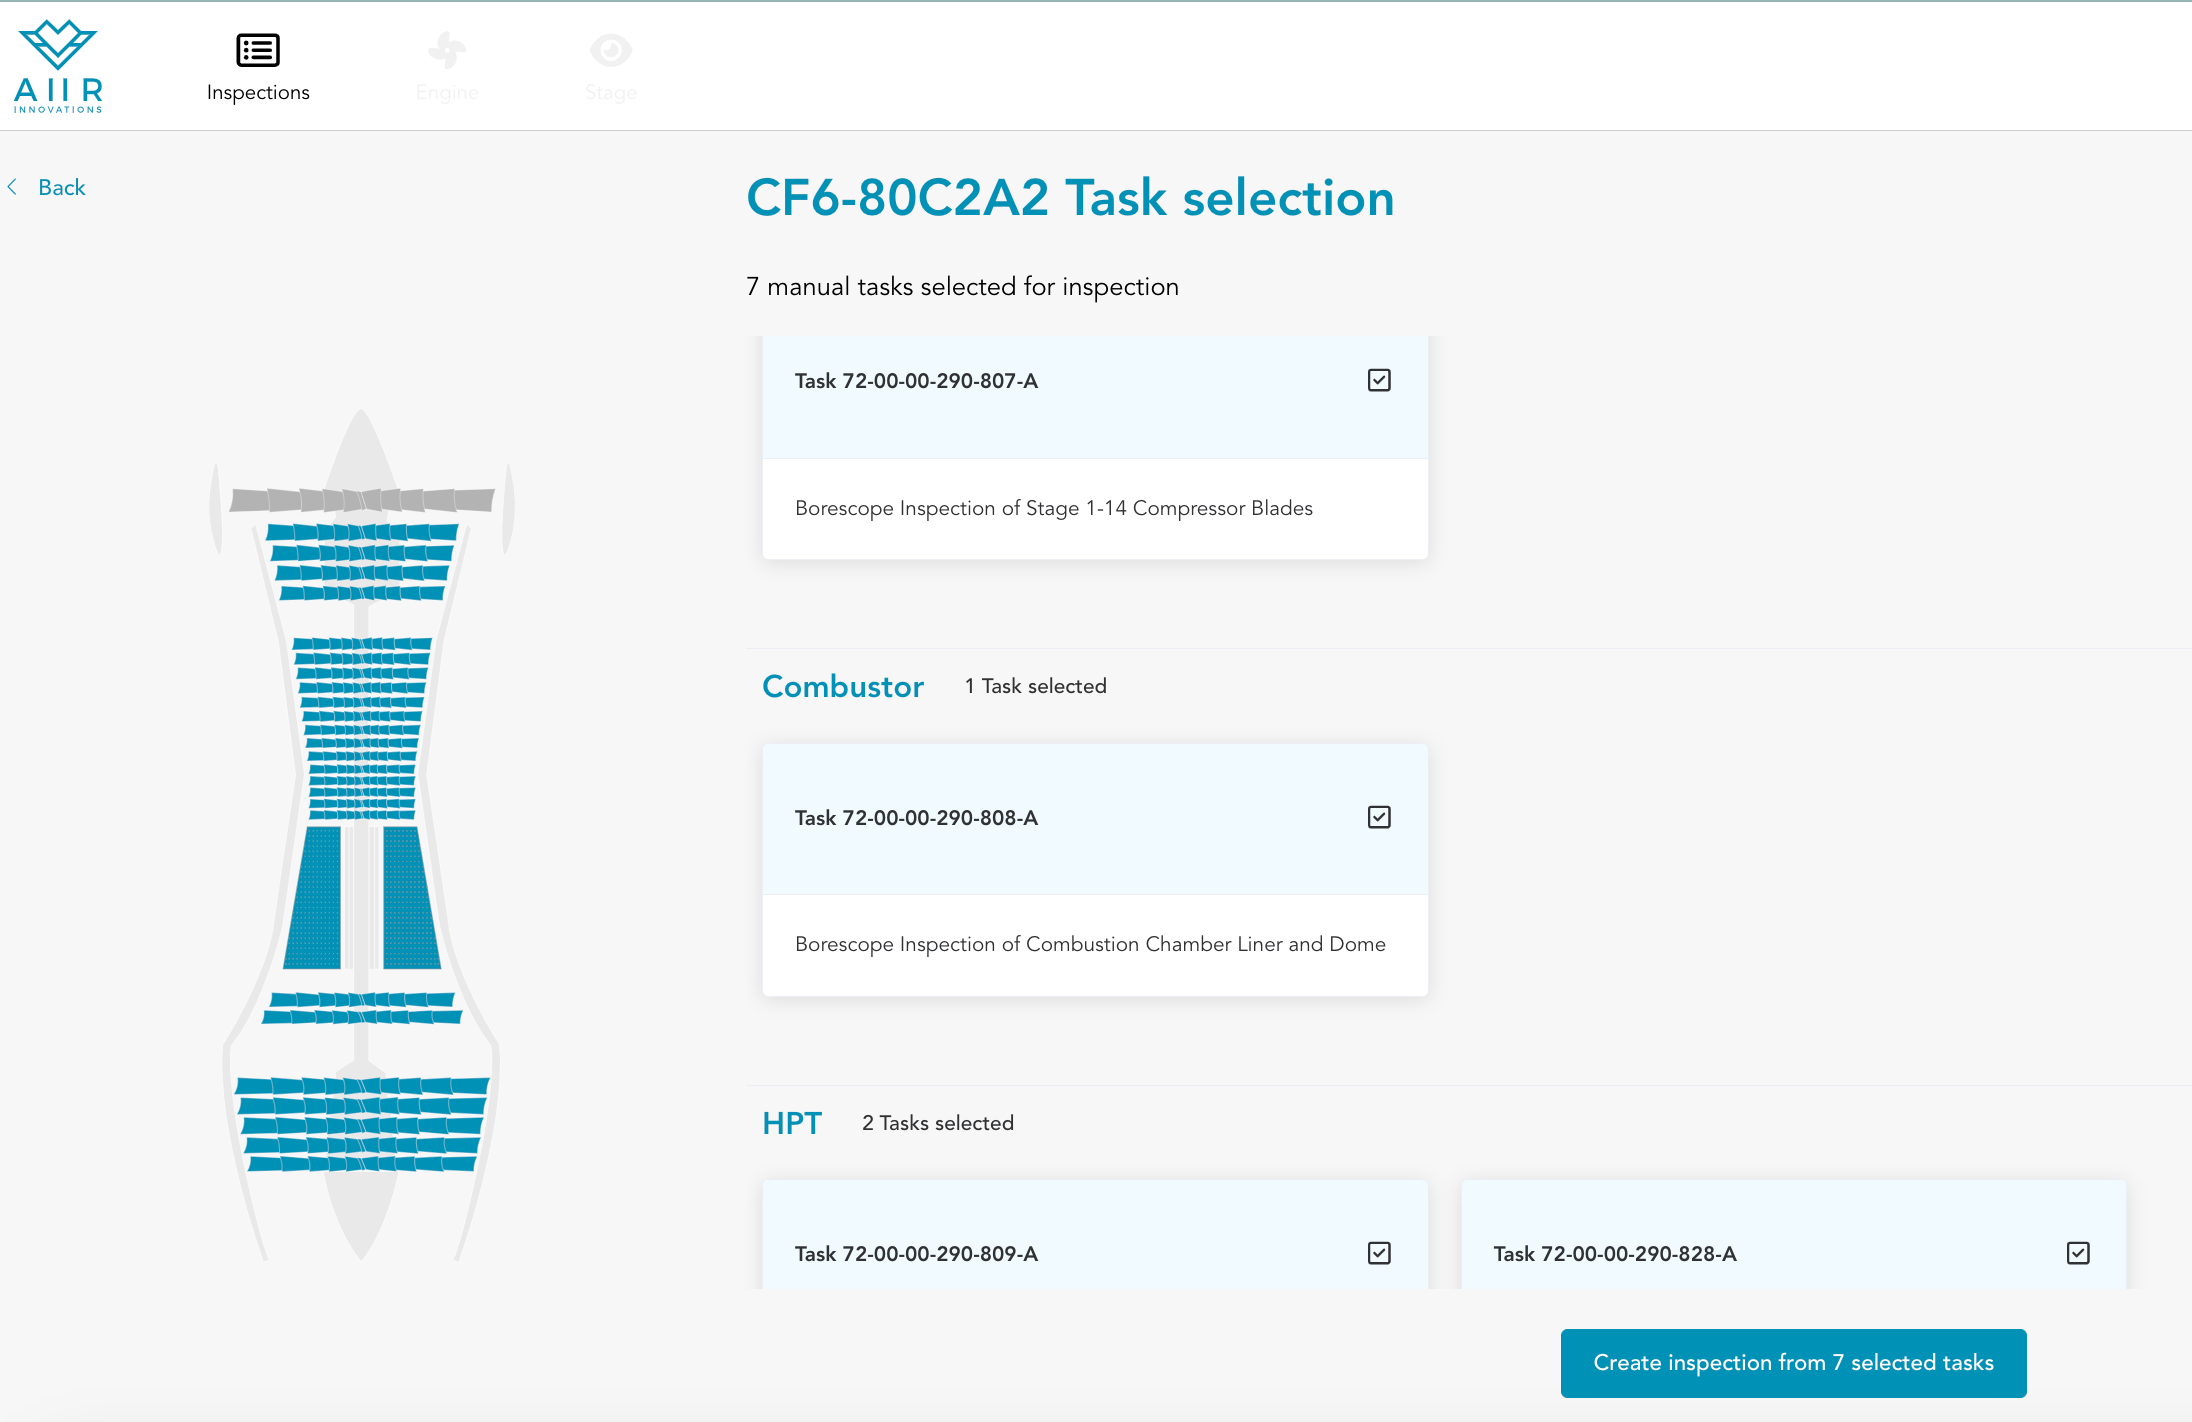
Access the Inspection Scope View: After you have created a new inspection, you will be directed to the Inspection Scope view.
Select Modules and Tasks: In this view, you can define the scope of the inspection by selecting the modules to be inspected and tasks to be performed during the inspection.
Use Checkbox Icons: To select tasks, simply click on the checkbox icon associated with each task. This action will add the task to your inspection scope.
Customize the Scope: You have the flexibility to customize the inspection scope based on your specific requirements. Add or remove tasks as needed to tailor the inspection to your needs.
Create Inspection with selected tasks: Once you have defined the inspection scope according to your preferences, click on ‘Create inspection from X selected tasks’ button on the bottom right to to save your selections to ensure that they are included in the inspection plan.
If you do not wish to select any tasks at this point, you have the option to skip the task selection process. To do this, click on the 'Start Empty Inspection' button. This will not generate any pre-defined tasks and allow you to proceed immediately.