In the ‘Al Findings' tab, you will find a comprehensive list of suggestions made by Aiir Co-pilot after processing all the video footage. This section allows you to review these suggestions and select the most pertinent findings to include in your inspection report. The findings are sorted by either ‘Timestamp’ of the video or in the order of ‘Relevance’ (newly introduced).
Sort By Timestamp : The “Sort By : Timestamp” view within the “Al Findings' tab provides an overview of all suggestions generated by Aiir Co-pilot, including the count of findings and are sorted by the video timestamp i.e. it starts at 0 seconds and till the end of the video length. You can view these findings in a thumbnail format, and you have the option to adjust the thumbnail size by sliding the ‘View mode' options and can see either 1/2/3/4 findings in a row.
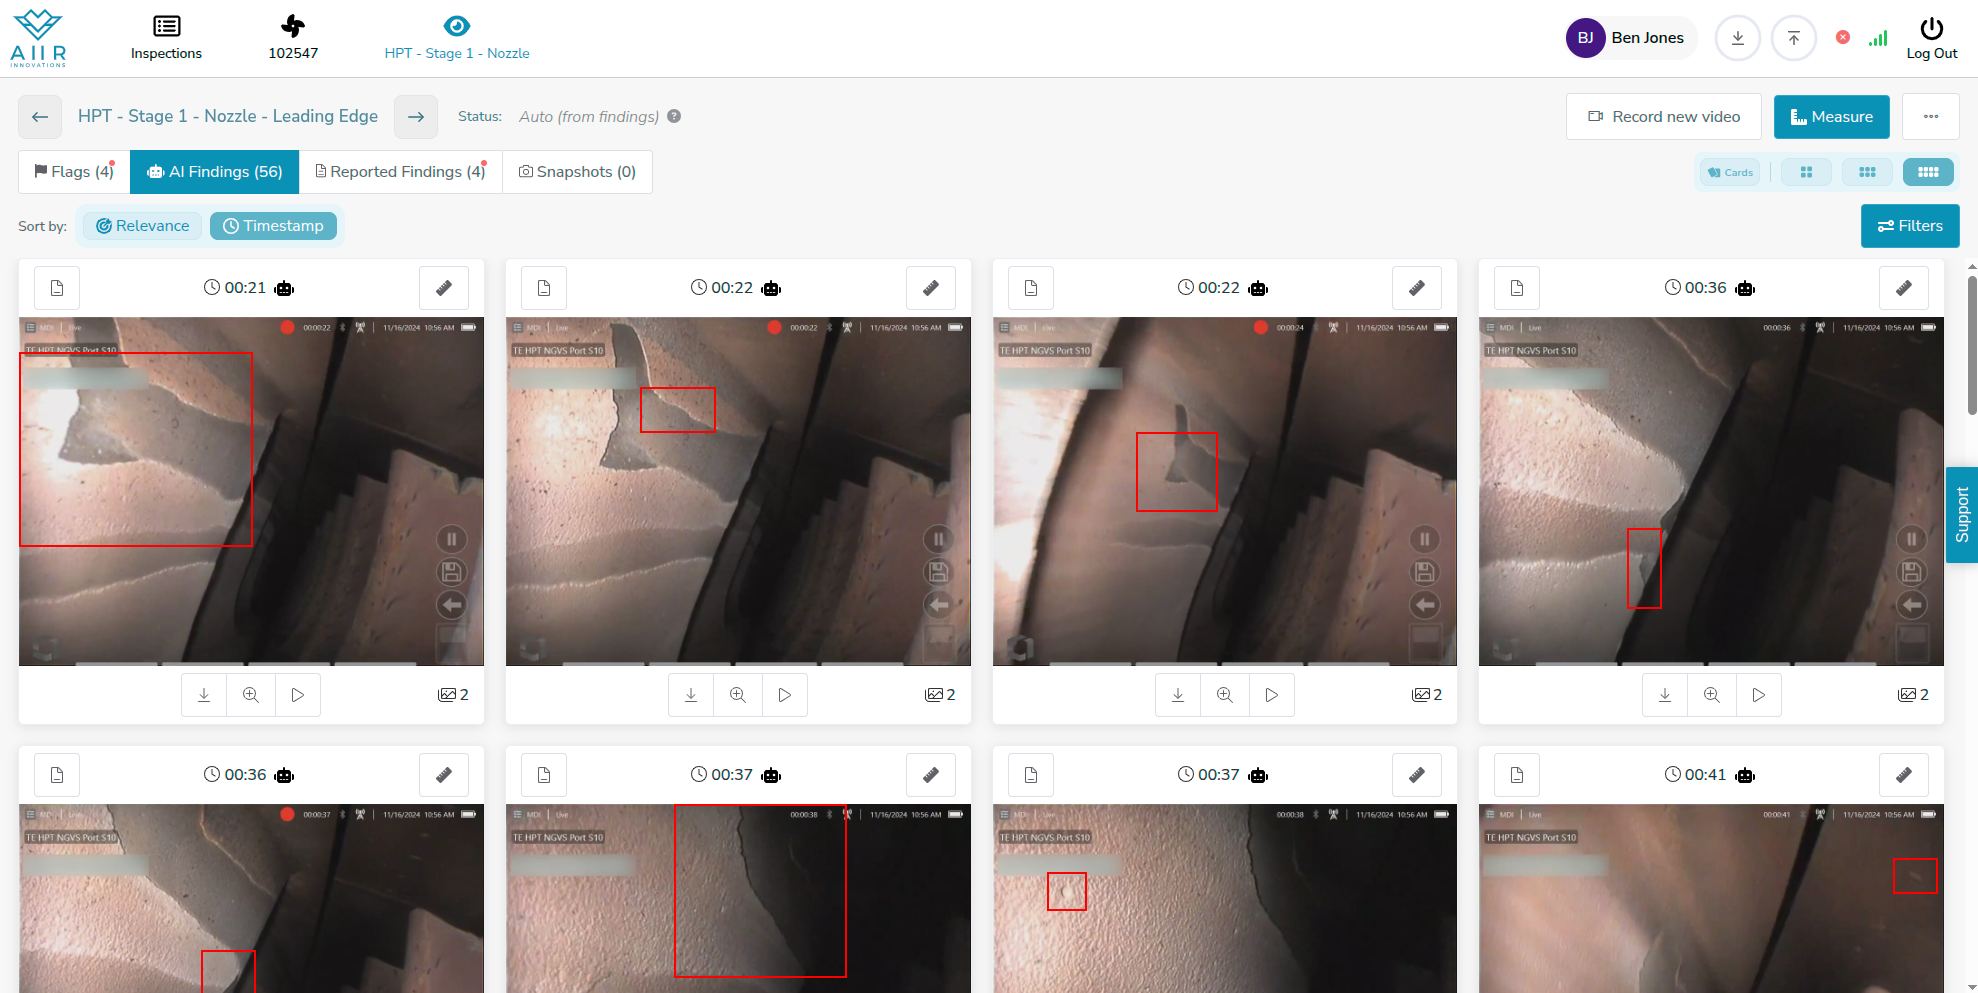
Sort By Relevance : This view presents findings sorted based on a proprietary ‘Relevance score’ that factors in various dimensions of the findings e.g. Zone, Size, previously reported finding etc. We recommend you start with the ‘Relevance’ view to review the top AI Co-pilot recommendations and then switch to the 'Timestamp’ view for faster processing/review. It is recommended to sort AI findings by Relevance and evaluate them using the “Cards” mode to improve the performance of AI Co-pilot by regularly helping it learn from your classification.
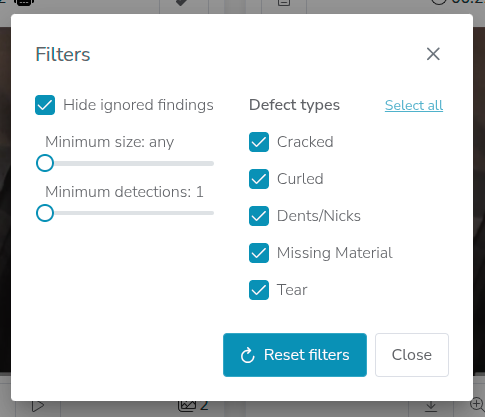
Filter : In this dialog, you can filter out findings. Available filters allow you to filter on defect size, the number of AI images per defect and defect type. Additionally, you can choose to view all findings auto-filtered by the AI by deselecting the “Hide ignored findings” option.
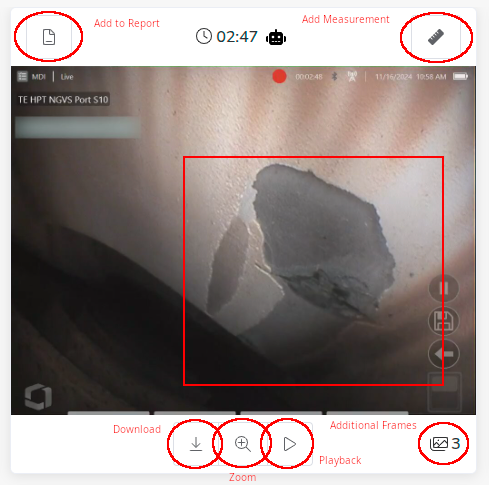
Thumbnail Options : The thumbnail header indicates the timestamp in the video or the blade number, if available. It also has icons to ‘Add to report’ or ‘Add measurement’ to the finding. You can also download, zoom or play any thumbnail using the ‘Download’, ‘Zoom’ and ‘Playback’ icons give in the bottom of the thumbnail. If the finding is already added to the report or if the measurement exists against the finding, the 'Add to Report’ and 'Measurement’ icons are highlighted in blue.
View Finding: To examine a particular finding more closely, begin by clicking on its thumbnail. This action will open the finding in detailed mode. In this view, you'll see the finding image on the left side, complete with a bounding box drawn around the area of interest. On the right side, you'll find a form with fields to input additional details about the finding.
Add Finding to Report : If you find the AI suggestions relevant and wish to include them in the inspection report, click on the 'Add Findings to Report' button. This action will categorize the finding for reporting and display it under the 'Reported Findings' tab. Multiple findings can be selected and added to the report by ticking the checkbox next to each suggestion. You can also provide additional information about the finding by filling out the available fields, as instructed in the manual.
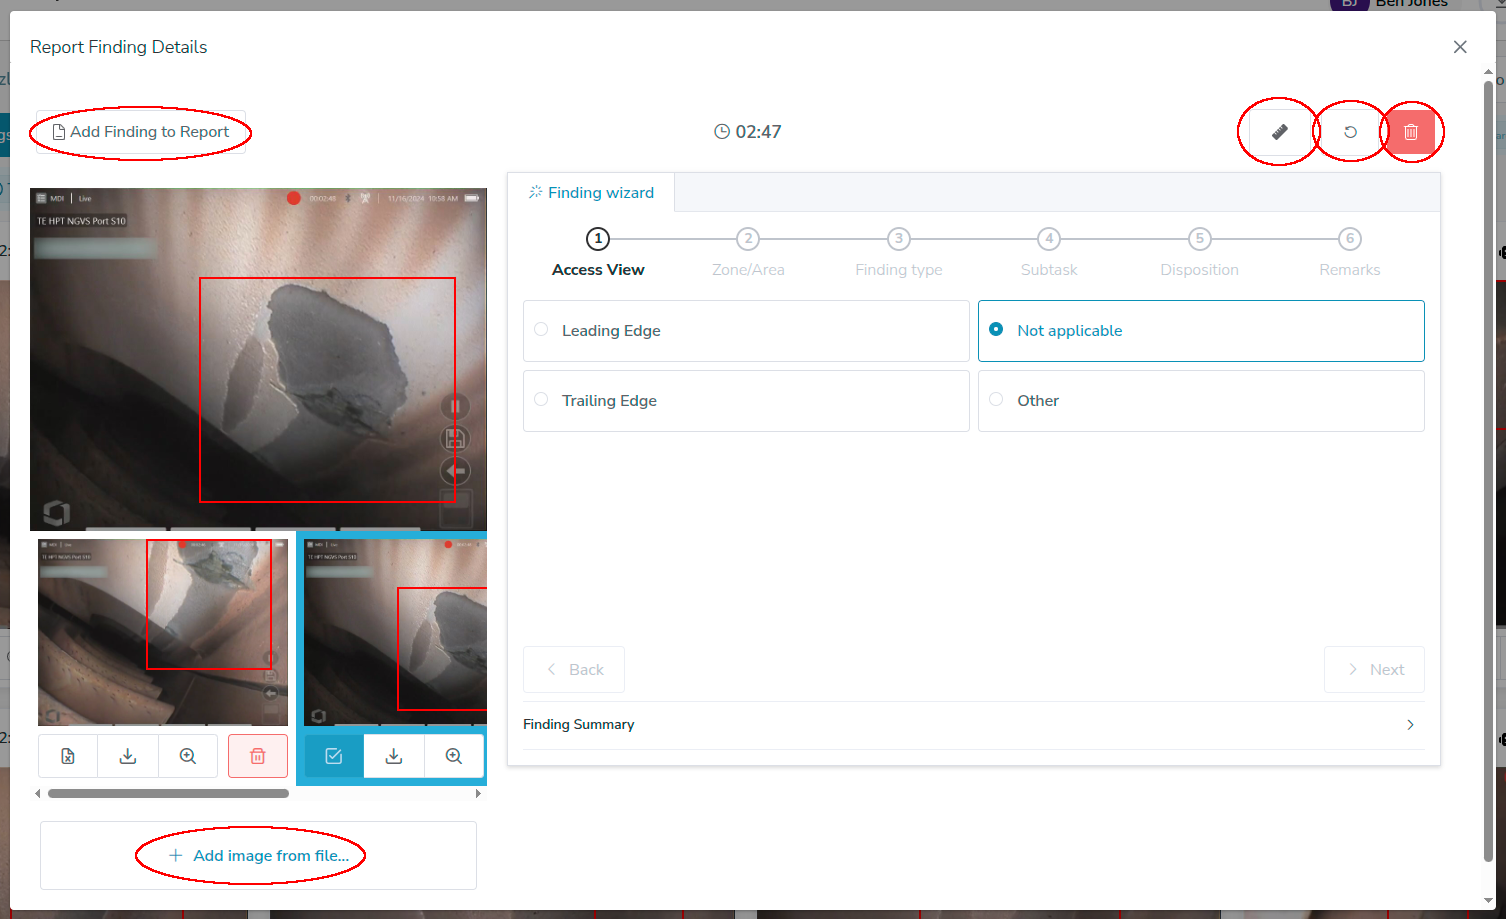
Add Image from File : Should you desire to include any additional images related to this finding, you can use the 'Add Image from file' button to attach relevant images to the finding for reference.
Reset Form : If you need to clear the details entered for a particular finding, you can do so using the 'Reset Form' button. This allows you to start afresh with the information provided for that finding.
Delete Finding : In cases where a finding is deemed irrelevant or unnecessary, you have the option to delete it. Simply click the 'Delete Finding' button to remove the finding from the list. However, deletion is not necessary and such findings can be ignored.
Reviewing AI-generated findings is a crucial step in the inspection process, enabling you to identify and select the most pertinent observations for inclusion in your inspection report. It empowers you to make informed decisions, enhance the accuracy of your report, and ensure that all relevant data is captured.